
Summer season is fun for riding a jet ski, and at the end of the season, you need to prepare the jet ski for the next season, which is winterization. Winterizing a jet ski is an essential job to do to run the jet ski efficiently or smoothly for the next summer season.
Winterizing all the PWCs are the same. For the ones who don’t know how to winterizes a jet ski or the newbies may feel these steps are a little tricky while doing it for the first time. So follow the steps properly to winterize a jet ski quickly and fastly.
Related post – How to winterize a trailer: With 9 helpful tips (opens in a new tab). If you have a trailer, then winterizing the trailer is also a must.
1. Clean the jet ski entirely
Cleaning the jet ski and hull is an essential step to do while winterizing it.
1. First, clean the outer area of your jet ski with a hose
You can clean with anything, but a hose will do an excellent job for you, and it will clean the jet ski properly and completes the work quickly.
After washing the jet ski with a garden (low-pressure) hose, then use hull cleaners such as Starbrite hull cleaner (linked to Amazon), and clean the jet ski (PWC). By cleaning it with a cleaner, the jet ski will shine as it was in the past.
After cleaning the jet ski (PWC) with the cleaner, then use any soft cloth such as microfiber cloth to get rid of any water droplets on the surface. Microfiber cloth is a soft cloth; you can wipe the things well with this cloth, and it will not leave any lint or dust on the surface of the jet ski (PWC).
Overall, after washing the jet ski (personal watercraft) with water, clean the jet ski with a cleaner to remove any hard stains on the jet ski (if any). After finishing the outer cleaning, go for inner cleaning.
2. Second, clean the engine bay
NOTE: Don’t wash the engine just after finishing the ride. If the engine is hot and if you wash the engine, it will cause problems.
Remove the seat of the jet ski (PWC) and wash them and under the seat as well; after finishing that, wash the engine bay. Don’t use a high-pressure hose because it will flush the water at high speed, and it can damage any electrical components in the engine bay; use a low-pressure hose or garden hose to wash it.
The essential thing to note while washing an engine bay is not to spray water inside the engine’s air intake, which causes problems if you spray water inside the air intake. The simplest way to prevent that is by covering the air intake with hand while washing the engine bay.
After finishing that, you are done with engine bay cleaning. Now, the engine bay is filled with water, so open the drain plugs to remove the water. The best way to remove all the water from the engine bay is by lifting the bow a little bit. So, by doing that, it removes all remaining water inside the jest ski (PWC) and on footwells as well.
A pressure washer will help a lot with cleaning and washing the trailer and jet ski as well. Check the product in Amazon, click here, or click the image below.

After cleaning the jet ski properly, drain it completely. And then, start the winterization process.
Check my article on 11 Simple maintenance tips for a boat: DIY (opens in a new tab). In that article, I mentioned all the DIY maintenance tips you can do quickly to maintain the boat properly.
2. Stabilize the gas
Stabilizing the gas is an essential step to do if you have any fuel left in the tank, because nowadays, all the boats and jet skis are using ethanol gas (E10 gas), which will create water inside the tank, and that water will damage the fuel tank over time. So, it is good to fill the tank more than 3/4th or full and add a stabilizer to it.
Topping up the fuel tank will prevent condensation inside the tank. And don’t leave the tank empty; it can cause problems (50/50 chances). Stabilizing the gas is an essential step to do while winterizing. Check the product in Amazon, click here, or click the image below.

Stabilizing the gas tank in a jet ski
- There are so many brands out there. Choose the perfect one for stabilizing. Now pour the stabilizer liquid into the gas tank, don’t pour the stabilizer how much you want. For every stabilizer you buy, they will give some instructions to use.
- Based on the instructions on the bottle, use it accordingly. If you use more, then the whole fuel (gas) will gum up. If you use less, it won’t stabilize the gas much. So, use it accordingly. They will tell to use 1oz for 10 liters or something like that, generally (quantity changes from brand to brand).
- After pouring the stabilizer into the tank, switch on the motor and leave it for some time (like 5 – 10 min). The stabilizer will flow inside all the fuel lines, carburetors, and cylinders, stabilizing the gas.
It’s good to use the stabilizer if you do not use your jet ski for 2 or 3 weeks. So, you won’t get any problems in the future. If you are storing the gas for a long time, then don’t forget to use a stabilizer.
Check this video on water formation in the gas tank, he explained it well
3. Flush the water inside the engine and then anti-freeze

Another essential thing to do for preventing corrosion is by flushing the water inside the engine exhaust of the jet ski. To pump water inside the engine exhaust, connect the hose to the flush port of the jet ski (PWC). For some of them (sea doo), you can find that near the jet nozzles in the above picture, you can see that.
First, start the engine and then flush or pump the water (essential step). Otherwise, suppose you start pumping water inside the engine before starting the engine. In that case, the water can fill up the exhaust and engine cylinders, damaging the motor if you start the jet ski with water flooded inside the engine.
So, start the engine first and then start flushing or pumping the water for 5 min (for time, you can see that in your user manual). After finishing that, first cut off the water, and then the cut off the engine (essential step). But before cutting off the engine, run the engine at 4000 or 5000 rpm for 5 sec, and then stop the engine so that all the water left inside the engine will be blown out.
Then drain the jet ski for some time and finally start the engine once more to blow out the remaining water in the exhaust completely. Don’t run the engine for more than 15sec without pumping water inside the engine exhaust because it can heat the engine if you are starting the engine without pumping water inside the exhaust.
One more essential thing to note is if the engine stops while flushing or pumping the water inside the engine, then cut off the water supply quickly so that engine (inside) will not be flooded with water.
Finally, pour antifreeze into a bucket and then start pumping the water into the motor for the last time. Then cut off the water first and increase the motor rpm for 5 sec to pump out the extra water and stop the motor.
Check the Starbrite anti-freeze product in Amazon, click here, or click the image below.

Then drain the jet ski for some time and finally start the engine once more to blow out the remaining water in the exhaust completely. Don’t run the engine for more than 15sec without pumping water inside the engine exhaust because it can heat the engine if you are starting the engine without pumping water inside the exhaust.
Essential step – Lift the jet ski bow so that if there is any water inside the jet ski, it will go out.
Related post – Saltwater maintenance for a jet ski (PWC): With corrosion prevention tips (opens in a new tab). If you are skiing in saltwater, then you need to check the article to prevent corrosion due to saltwater.
4. Use fogging oil (in the air intake and cylinder)
After flushing the engine with water, all the motor’s inner walls will contain droplets of water, which will damage the motor’s inner walls if you didn’t get rid of them. By using a fogging oil (it is a lubricant), it will coat all the inner walls of the motor with lubricant to prevent corrosion oner time.
So, a fogging oil will prevent corrosion by coating all the motor’s inner walls with lubricant. Check the product in Amazon, click here, or click the image.

Using fogging oil in air intake and cylinders

- You can do this process while starting the engine to stabilize the tank and flushing the engine with anti-freeze. The first three steps (stabilizing the gas, flushing the engine with anti-freeze, and using fogging oil) can be done at a time.
- First, open the air filter and start spraying the fogging oil into the air intake while the motor is running (for 5 – 10 seconds). Repeat the whole process at least two or three times properly until the engine stalls.
- While doing this process, white color smoke will come out from the engine. If the engine stops while doing this process, it is a good sign. Which means the whole area inside the engine is coated properly.
- After completing the air intake part, close the air filter with the cap, then stop the engine and open the spark plugs, and start spraying the fogging oil into these holes too. So, the inner layers of the cylinder will be coated as well.
- While doing the spark plugs part, don’t start the engine completely, just simply press the start button and stop immediately. While doing this process, close the spark plug holes with fingers or something, for coating the inner walls of the cylinder properly.
At that time, check the color of the center electrode of the spark plugs. If the center electrode of the spark plugs is black, then change them. Generally, the white color center electrode indicates that the spark plug is in good condition.
After finishing with the engine part, spray silicon spray (wd-40) (linked to Amazon) all over the wirings in the engine bay and inside the engine bay completely to prevent any corrosions over time. Spraying the wd-40 is an essential step to do while winterizing the jet ski to prevent any corrosion over time.
5. Remove the batteries off the jet ski
Removing the batteries from the jet ski is also an essential task to do so that the battery won’t be dead for the next season.
Removing the battery from the jet ski
- First, remove the battery (negative terminal first and then positive terminal). Then clean the battery with any cleaner and get rid of any dust stuck on the battery.
- After that, check the case properly, and make sure it doesn’t have any bulge or any other cracks on the battery. If there are any bulges or cracks on the battery means, you are overcharging the battery.
- Next, check the terminal posts. If the terminals are corroded, then clean it up with a terminal post cleaner or any small stiff bristle brush. Next, check the battery posts, clean them if corroded, use any cleaner or soda, and clean them.
- Every month check them and tighten them up. So, by doing that, you can prevent low voltage in the battery. If they are loose, then you will get low voltage.
- Then check the distilled water level, and you need to fill it if the level is less. Use only distilled water, not any other water or tap water. If you are using a lead-acid battery, then it is easy to refill the distilled water than a maintenance-free battery.
- Then check the voltage of the batteries and charge it if the voltage is low.
- Finally, coat the terminal posts with grease. These are the basic steps to do every once in a season to avoid any problems with batteries. Then store on any rubber surface in the garage or in your home to prevent any battery drain conditions.
Different voltage levels of all types of marine batteries are listed below in the table (source).
| Charge level | Sealed or Lead Acid battery (in volts) | Gel battery (in volts) | AGM battery (in volts) |
| 100% | 12.70+ | 12.85+ | 12.80+ |
| 75% | 12.40 | 12.65 | 12.60 |
| 50% | 12.20 | 12.35 | 12.30 |
| 25% | 12.00 | 12.00 | 12.00 |
| 0% | 11.80 | 11.80 | 11.80 |
6. Cover the jet ski and do regular checks during winter
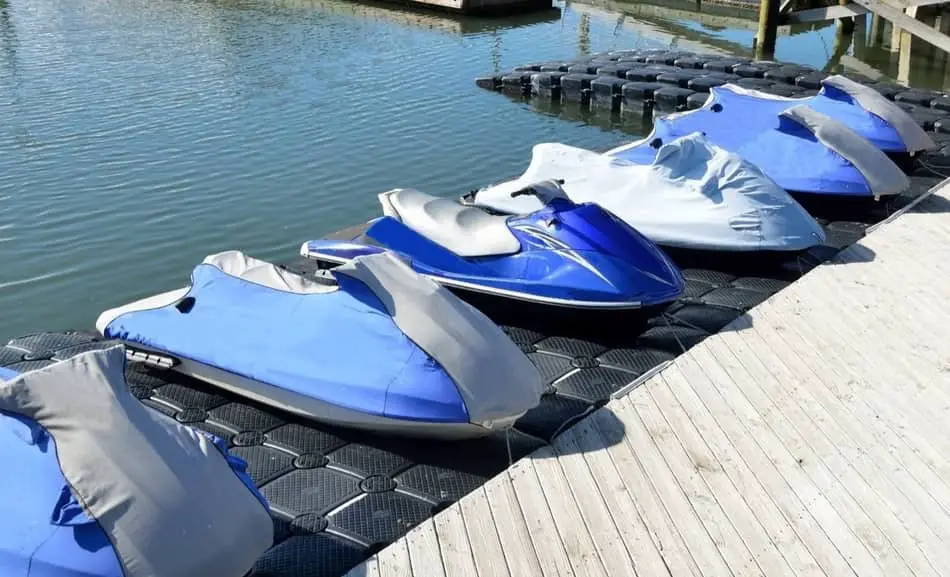
Cover the jet ski adequately if you are keeping the jet ski outdoors. And any living creature can get into it easily if you didn’t cover the jet ski. Check the product on the Amazon, click here, or click on the image below.

Regular checks are essential for a jet ski if you are keeping it outdoors. Check the jet ski every one or two weeks to ensure everything is doing well or not. Generally, snow might fall on the jet ski, clean it regularly.
Check my article on How long can you leave a boat in the water (opens in a new tab) to know all the basic things you need to do to prevent any growth on the boat hull.
Bottom line
By winterizing the jet ski properly, you can ensure that the jet ski will be in perfect condition for the next season. By doing it yourself carefully and efficiently, you can save $100 – $200.